Remote Desktop
Remote access via your company's VPN allows you to either:
- Connect and use your work desktop computer as though you are sitting in front of it
- Connect your work laptop to the company network as though you are in the office
If you do not have remote access already, please seek approval from your manager. Once approved, please email the Private Universe Helpdesk and remote access will be enabled on your account.
You will need to include a screenshot of an anti-virus scan in your request for remote access.
Please run a full scan of your computer using your preferred anti-virus product and ensure the results come back as clean. If you do not have an anti-virus product, download the free version of Malwarebytes.
This article describes how to use a remote connection to your work computer if you are using a personal device.
If you are already using your work computer and have taken it out of the office, you won't need these instructions. You will just need to start the VPN connection as described on the Cisco VPN page.
Prerequisites
If you intend to connect to your work desktop computer, please ensure you make note of its name and leave it powered on before you leave the office. To find it:
-
Right-click the Start button > Go to System:

A new window will open:
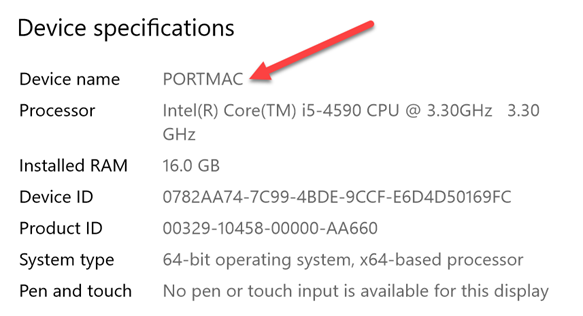
-
Note down the Device name. You’ll need this when you connect later.
Establish a VPN session
See the instructions on the Cisco VPN page.
Open a Remote Desktop Connection
Windows
Follow these instructions if your personal device is a Windows computer.
-
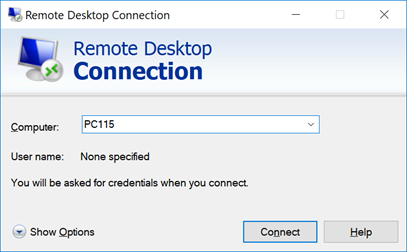
Open the Start menu.
-
Search for Remote Desktop Connection.
-
Click Remote Desktop Connection.
-
Enter the name of your work computer you noted earlier in the Computer field.
-
Click Connect.
-
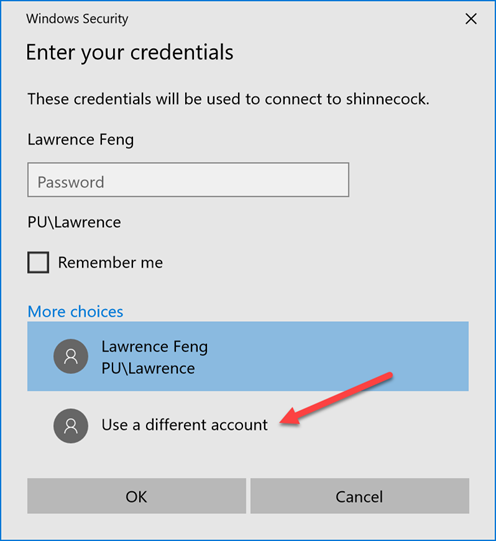
Click More choices.

-
Select Use a different account.
-
Enter your username and password in the following format, then click OK:
- Username: your email address
- Password: your work computer password
-
If prompted with a "The identity of the remote computer cannot be verified" message, click Yes.
You should now be connected to your work computer.
Mac
Follow these instructions if your personal device is a Mac.
Setting up Windows App for the first time
You need to install and configure the Windows App app from the App Store the first time you wish to connect. If you have already done this, skip to Starting your remote session.
Windows App is the new name for Microsoft Remote Desktop. If you had Microsoft Remote Desktop installed previously, it has likely updated itself to become Windows App, so you can skip to Starting your remote session.
Some screenshots below may be of the old app. Feel free to contact the Private Universe Helpdesk if you have any questions.
-
Download Windows App from the App Store.
-
Enter your own Apple ID and password if prompted.
-
Once the app has finished installing, press the command ⌘ and space keys together, then type Windows App.
-
Ensure Windows App is selected, then press return/enter.
-
If prompted with "Help us make your experience better", press Not Now.
-
When prompted with "We need to request access to your microphone and camera", press Continue.
-
When prompted with "Windows App would like to access the microphone", press OK, and do the same for the camera.
-
Click Skip on the Welcome to Windows App screen.
-
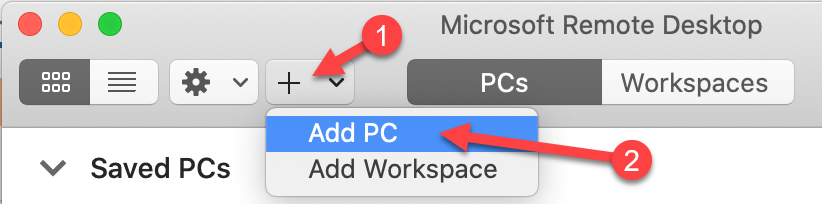
Click on the + button in the top-right corner, then select Add PC.
-
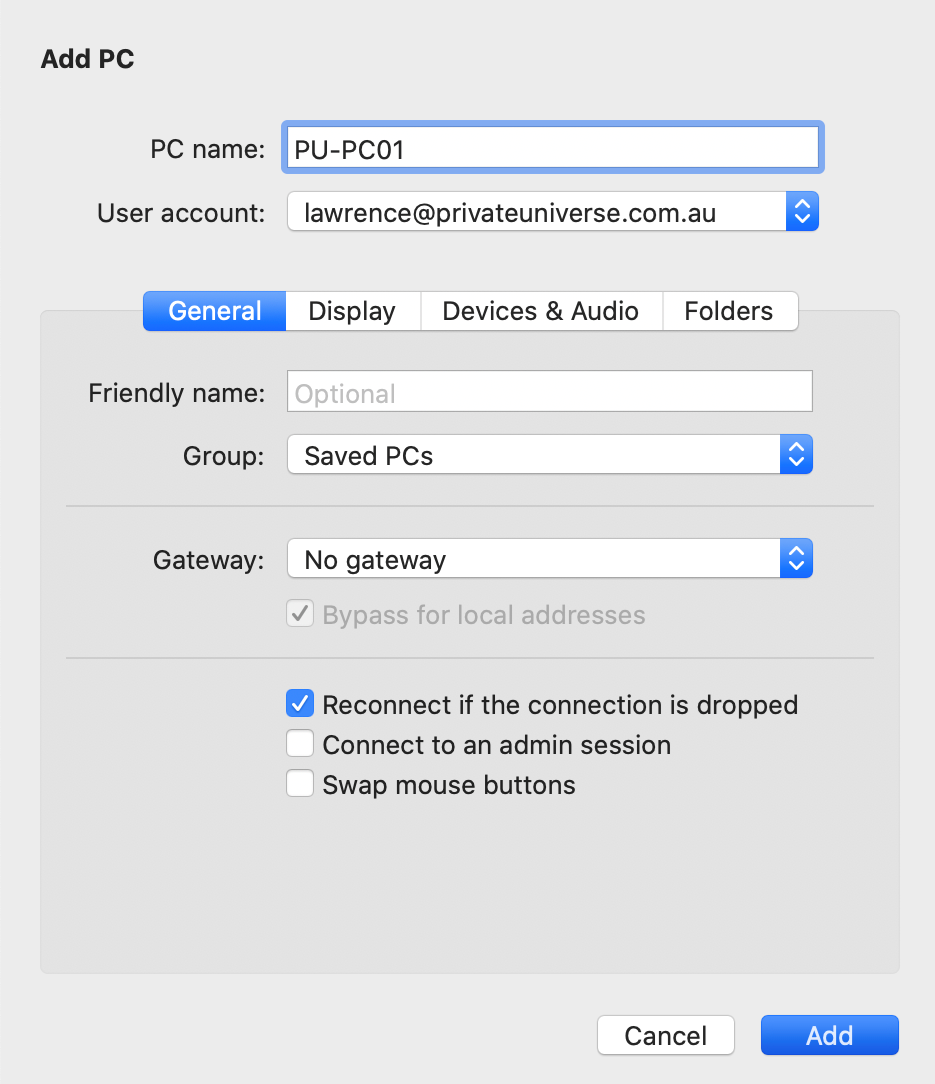
Under PC name, enter the name of your work computer you noted earlier.
-
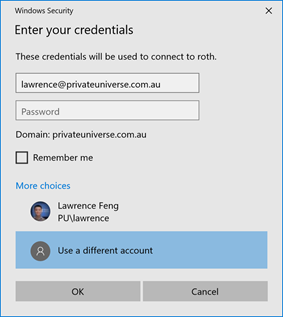
Under Credentials, select Add Credentials.
-
Enter your username and password in the following format, then click Add:
- Username: your email address
- Password: your work computer password
The window should look something similar to this afterwards.
-
Select the Display tab, then tick Use all monitors.
-
Click Add.
Starting your remote session
-
If Windows App isn't open already, press the command ⌘ and space keys together, then type windows app.
-
Ensure Windows App is selected, then press return/enter.
-
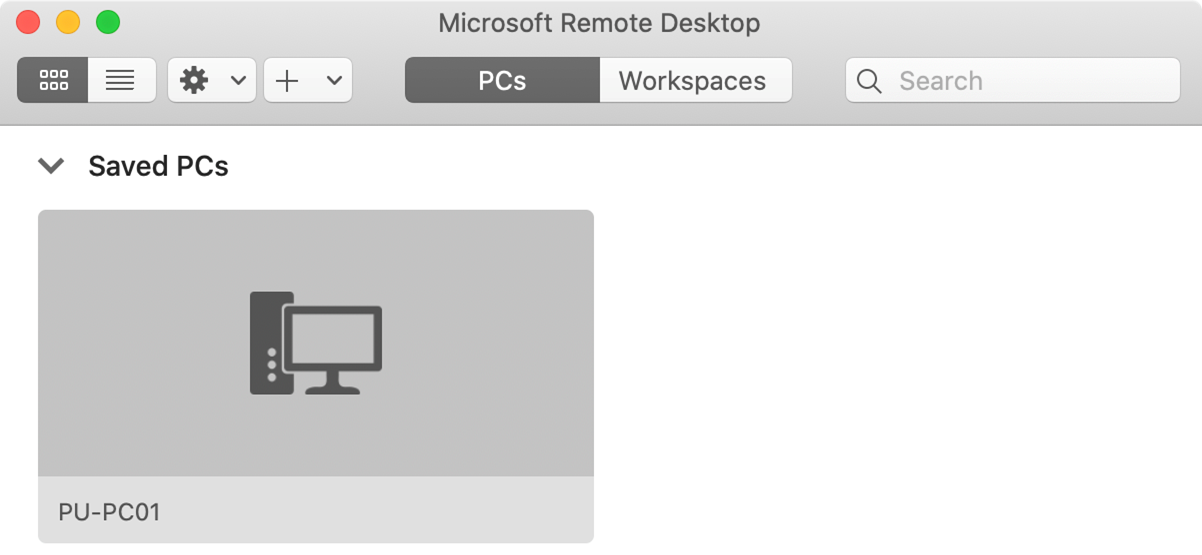
Double-click on the item labelled with the name of your work computer under Saved Devices, which may be found under Devices in the sidebar.
-
If prompted with a “The certificate couldn’t be verified back to a root certificate” message, click Continue.
You should now be connected to your work computer.
Closing a Remote Desktop Connection
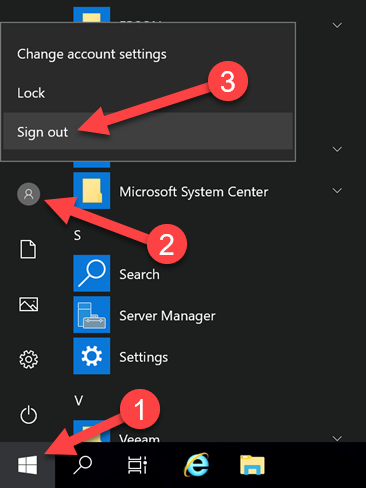
Click on the Start button in the bottom-left corner of your screen, then click on the little person (this could also be a picture) and select Sign out.
Ending your VPN session
See the instructions on the Cisco VPN page.